
How to Build Your Own Skateboard Deck | Guide Step By Step
You are at the right place if you are looking for how to build your own skateboard deck. Skateboards have a shape that is extremely similar to surfboards, which are also not too difficult to make. The size of the deck and the fact that the skateboard has wheels attached to the deck are the differences. It’s also possible to make your diy skateboard deck.
Many people use skateboards for short-distance travel, and they can accomplish incredible tricks. Skateboarding has been a huge success, and it has united a whole culture. You will discover how to construct your own skateboard deck designs in this brief read. We’ll do our best to make things as easy and clear as possible for you! Now let’s take a look at the steps of how to make a skateboard deck.
In this article we will provide you information about how to build your own skateboard deck.
Steps of how to build your own skateboard deck
You have to follow steps given below to build your own skateboard deck:
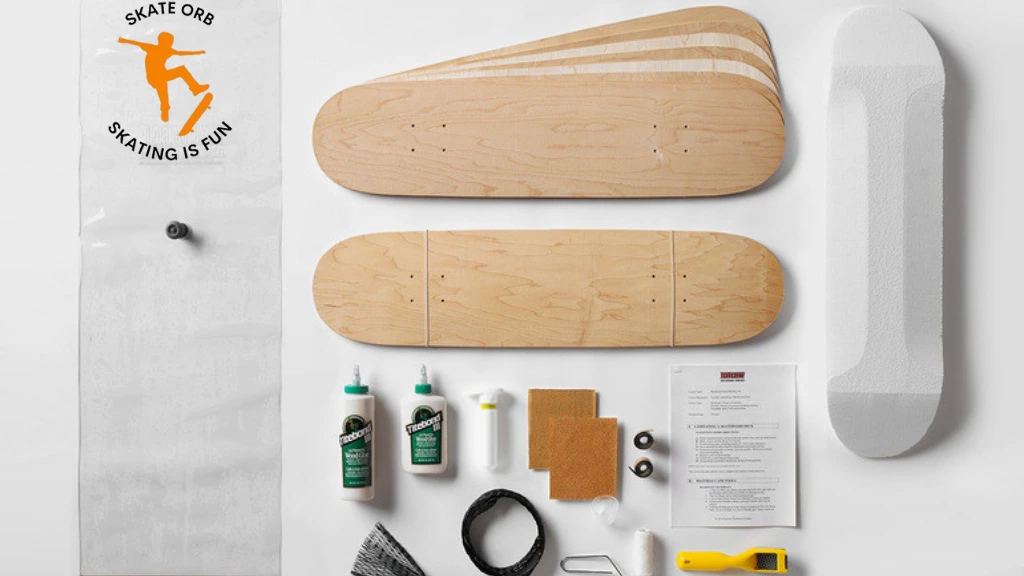
Get the plywood ready
Skateboards are not made from a single piece of wood since they must withstand wear and tear from frequent use. For this reason, several veneer and plywood layers are joined and pressed to create a skateboard deck. Skateboards typically have seven veneers, although there are some decks that have nine veneers.
The amount of veneers and how they are arranged will correspond to the rigidity and weight of a skateboard. The average board is 10mm thick. Three categoriez can be used to categorize veneers:
- plywood facing
- Centre plywood, sanded or not
- Unsanded plywood with cross bands
We must arrange the veneers in the following manner for a deck with seven layers:
- plywood facing
- Middle plywood
- lateral plywood
- Middle plywood
- lateral plywood
- Middle plywood
- Face plywood
Affix the veneers
We must attach the veneers after positioning them. Tie bond is the best material to use for this phase because it is designed specifically for plywood and will hold the layers of that material firmly in place. Make sure the sanded side of the face plywood is facing up and the unsanded side is facing down before you begin glueing.
The unsanded section should then be covered with a tie bond. Place the centre layer on the face next, and then repeat the previous steps seven times.
Skateboard Press the Unshaped Board and Cure It
The time for pressing has come after making sure that all veneers are adhered to one another. Select two cardboard pieces with a minimum width and length of three inches greater than the board. Put the veneers between the cardboard and the frame after taking the frame. Afterward, you will need:
- Bolts and 20″ to 16″ nuts are used
- channel irons from 2″ to 4″
- Washers
To properly press the frame, place the channel irons in the centre of it. Give the skateboard deck at least eight hours to mould. Every hour, check the deck to make sure the bag is securely fastened. More air will need to be sucked out of the bag.
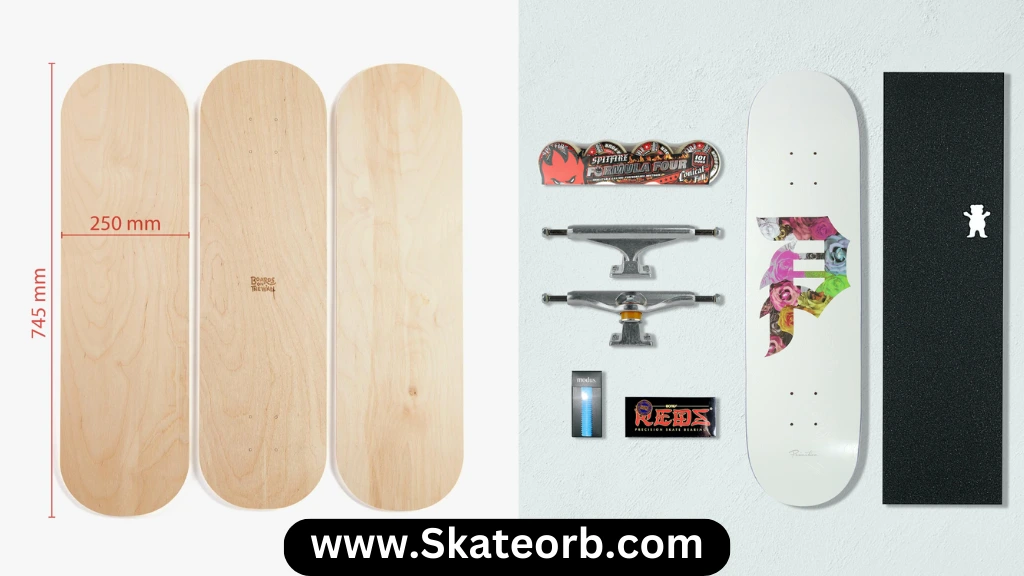
Remove the Uncut Skateboard Deck and Apply Your Design
Remove the skateboard deck and the cardboard from the mould once it has dried out. You now have a skateboard deck that is uncut and available for design use, if desired.
You can either use a design card programme for skateboard design (preferred if you want the tail and nose components to be more precise) or draw the design manually on graph paper. When the design is prepared, place it on top of the uncut skateboard deck without taping it down. You must first be certain of the board’s lengths at the nose and tail. Once you’ve established it, mark the
Cut Out the Deck According to Your Design
It’s time to start cutting out the deck in accordance with the design you designed in the previous phase. Due to its accuracy, we advise using a band saw; but, if you don’t have one, a jigsaw will work, albeit with less ideal outcomes. To prevent getting splinters all over the board after cutting out the deck, use a router or a rasp to round the board edges.
Smooth out the skateboard deck
There is one more step to take after curving the board edges. The deck must now be completely sanded with steel wool or sandpaper until it is extremely smooth. Before you smooth the deck, make sure to drill out the truck holes.
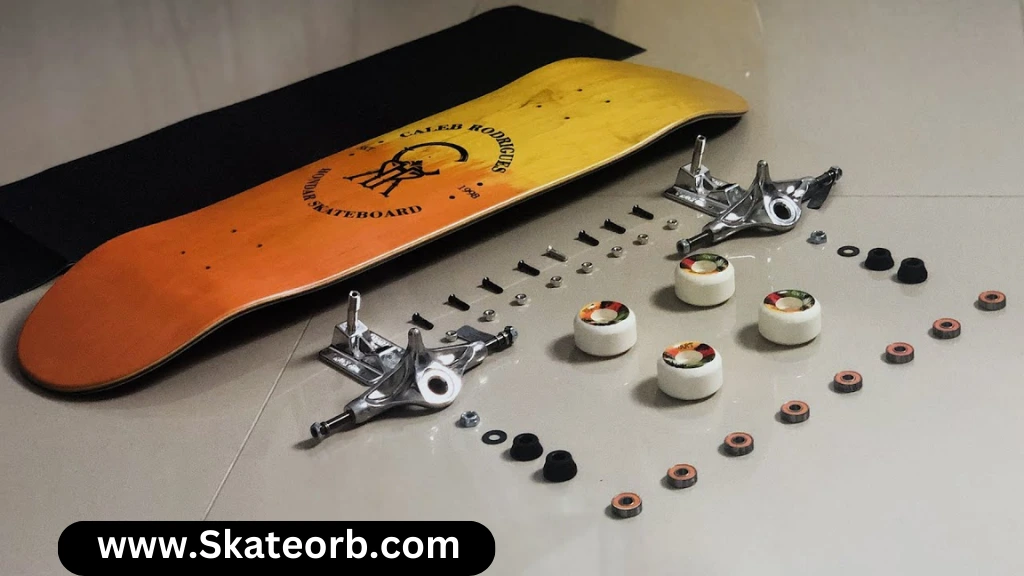
Conclusion
Skateboard deck construction is fascinating, rewarding, and pure joy! It allows you the freedom to design and customize how you like. With any luck, this tutorial on building a skateboard deck will increase your sense of success and skateboarding enthusiasm. You can also make an old school skate deck by yourself.
Making a skateboard designs deck requires effort, but doing so rewards you by teaching you new abilities. Don’t forget to share this article with other skating aficionados you know if you had fun designing your deck. Hope this article helps you to get enough information about how to build your own skateboard deck.
FAQs
Can you make your own blank skate deck?
Surprisingly, building a skateboard is easier than most people realise. A jigsaw, a skateboard mould and a vacuum press are the only tools needed to make the deck, or wooden board, although even these can be created at home with a little perseverance.
How many piles does a skateboard deck contain?
Seven or eight plies of wood are crushed and cemented together to form the skateboard deck. You must be aware of the various sizes, shapes, and technical characteristics of skateboard decks in order to make an informed decision.
How can I pick a quality skateboard deck?
There is no right or incorrect deck; it all depends on personal preference, therefore it’s better to experiment with various sizes and shapes. Narrower boards are typically more responsive and easier for tricks, while larger boards typically tend to be more stable.

Who Is Roy Harris
Hey there, I’m Roy Harris, and skateboarding is my life.
Growing up in sunny Southern California, I fell head over heels for skateboarding at an early age. From the moment I stepped on a skateboard, I knew it was my calling.